Public Wi-Fi offers convenience, but it also exposes Linux devices to risks like traffic monitoring, spoofed networks, and unauthorized access. Whether you're a seasoned digital nomad or just connecting on the go, public hotspots make it easy to get online — and just as easy for attackers to intercept data or impersonate trusted networks.
Cybercriminals routinely monitor public Wi-Fi networks to steal sensitive information. Others set up 'evil twin' networks designed to impersonate legitimate hotspots.
This guide walks through practical steps to secure Linux on public Wi-Fi, from disabling exposed services to hardening network and browser settings.
Why Secure Linux on Public Wi-Fi
Recent versions of Windows and macOS allow you to set profiles when using different networks. On both operating systems, you can choose a public profile when using an untrusted wireless hotspot. This effectively hides your device from being automatically detected by other devices on the Wi-Fi network, which can provide some protection against bad actors trying to monitor users' traffic.
Public profiles also disable services like printing and file-sharing, which can be exploited to access your files.
Most Linux distributions don't have this automatic feature, so you'll need to configure your device manually to have the same protection.
How This Setup Works
The first step is to use the command line to disable unnecessary services. This includes Samba file sharing, SSH, and any other features that attackers on the Wi-Fi network could exploit remotely.
Next, connect to a reliable VPN on public Wi-Fi to establish a secure virtual tunnel for all your sensitive web traffic. This encrypts your web traffic before it leaves your device, adding protection against packet sniffing.
You can also install and configure Uncomplicated Firewall (UFW) to block unauthorized incoming connections. Configure NetworkManager to randomize your device’s MAC address on each connection, making tracking more difficult.
The Firefox browser can be hardened for use in these environments, such as by requiring it to use DNS over HTTPS (DoH) to prevent threat actors from capturing DNS requests and discovering your browsing history.
Finally, maintain strong device security by configuring encryption and a quick screen lock.
Step 1. Disable Non-Essential Services
To find all Linux processes and services that are currently listening on their associated ports, open Terminal and run:
sudo ss -tulpn | grep -E '(LISTEN|UNCONN)'
For example, you may see:
tcp LISTEN 0 4096 127.0.0.1:631 0.0.0.0:* users:(("cupsd",pid=7072,fd=7))
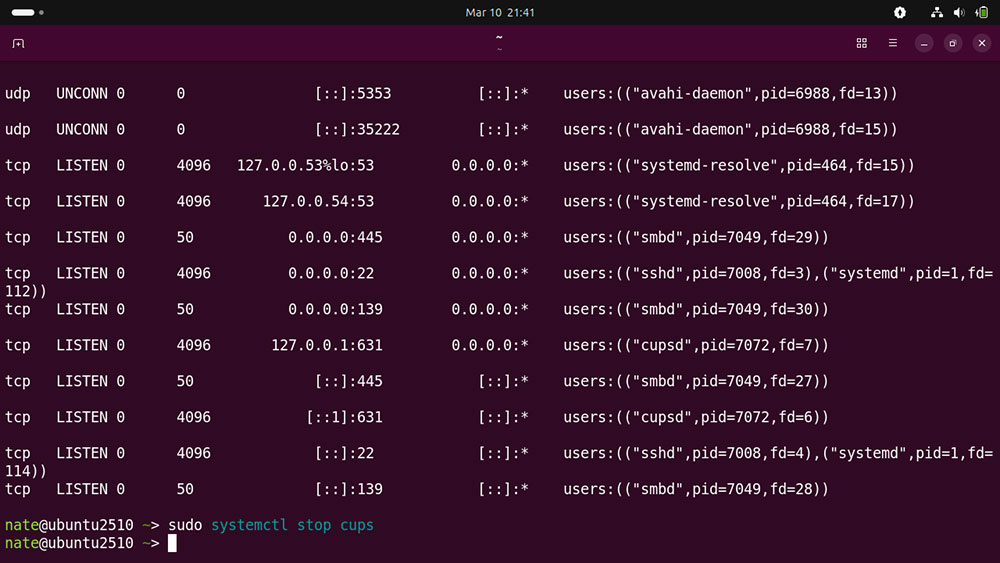
This shows the CUPS print daemon listening on TCP port 631 for network printing. Because it is bound to localhost, it is not accessible to other devices on the network, which reduces exposure on public Wi-Fi.
You can stop a specific service using the systemctl stop command:
sudo systemctl stop cups
Do the same for the following services if they're running:
- ssh — SSH server
- smbd, nmbd — Samba file and printer sharing
- avahi-daemon — Network discovery (mDNS), which broadcasts your laptop’s name and services
Reboot your laptop to restart these services automatically once you're finished using public Wi-Fi.
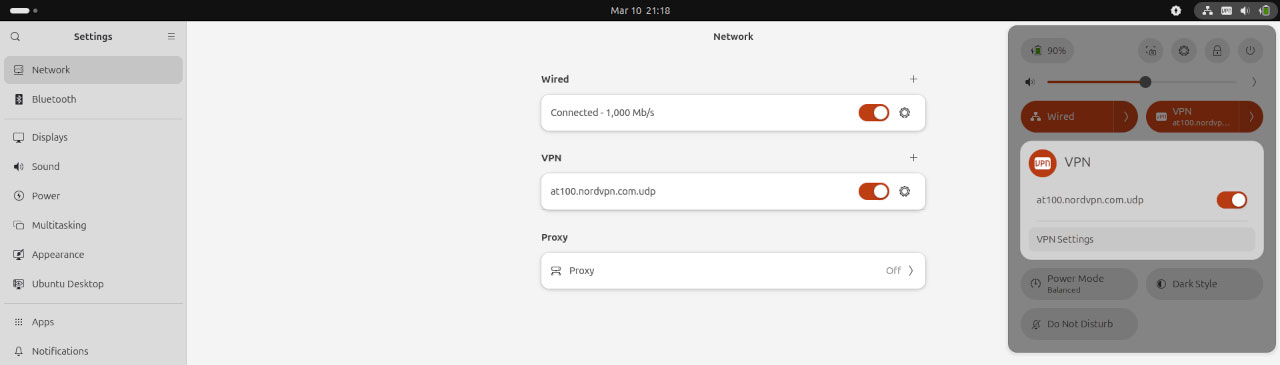
Step 2. Connect to a Reliable VPN
Privacy-focused Virtual Private Networks (VPNs) can offer strong protection when used on public Wi-Fi, as they route sensitive web traffic through a VPN tunnel. This makes it difficult for local snoopers to monitor your browsing history and web app usage.
Many major VPN providers offer dedicated Linux desktop clients. Download the client from the provider’s website.
No Linux client? Check whether your VPN service provides OpenVPN configuration files, as the protocol is supported by most mainstream Linux distros out of the box.
Follow our guide on connecting with OpenVPN on Ubuntu Linux for further help.
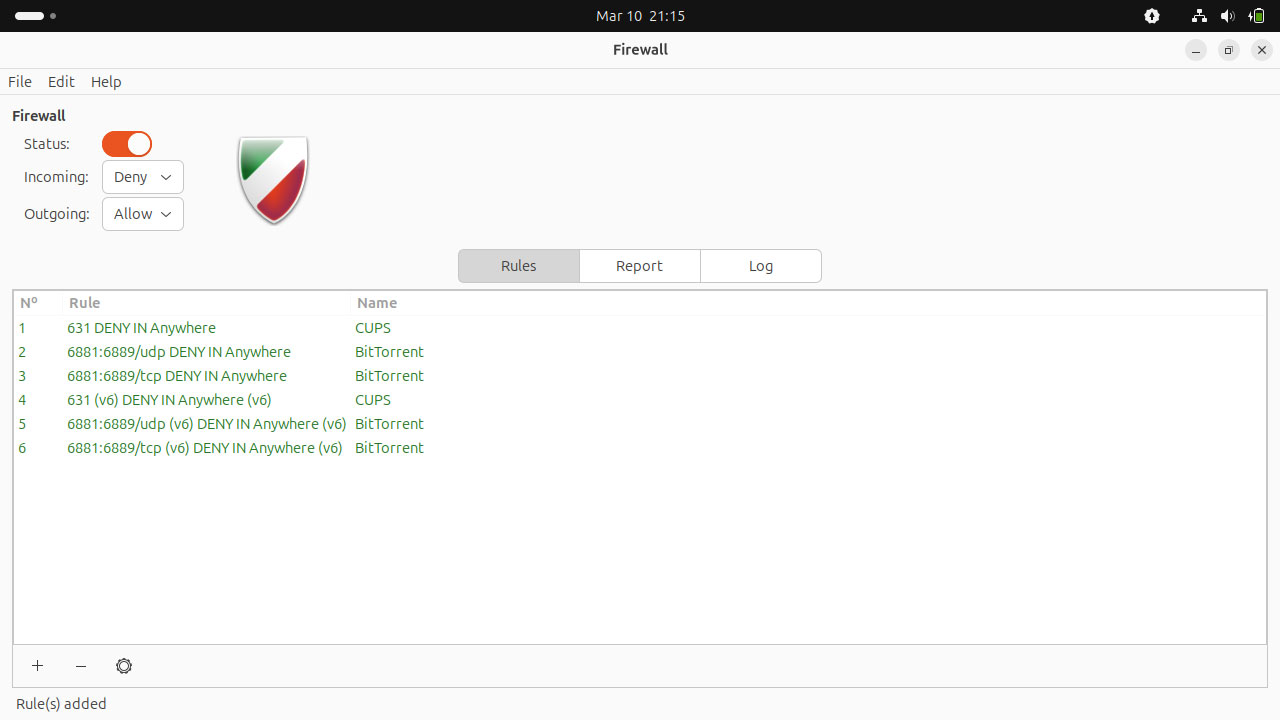
Step 3. Enable Uncomplicated Firewall
Most popular Linux distros come with UFW preinstalled but not enabled. You can activate it in Ubuntu by running:
sudo ufw enable
View current firewall rules with:
sudo ufw status verbose
UFW defaults to allowing outgoing connections but denies incoming ones. Use ufw allow to permit specific services or ports:
sudo ufw allow ssh
Or
sudo ufw allow 22/tcp
Block others using deny if needed:
sudo ufw deny 23/tcp (Telnet)
Alternatively, install UFW’s graphical frontend to view and manage firewall rules:
sudo apt install gufw
Step 4. Use a Randomized MAC Address
You can use GNOME or KDE's NetworkManager to configure Linux to use a randomized MAC address each time you connect to your chosen network.
First, open the network settings, then choose the Identity tab.
Double-check that the network Name is correct.
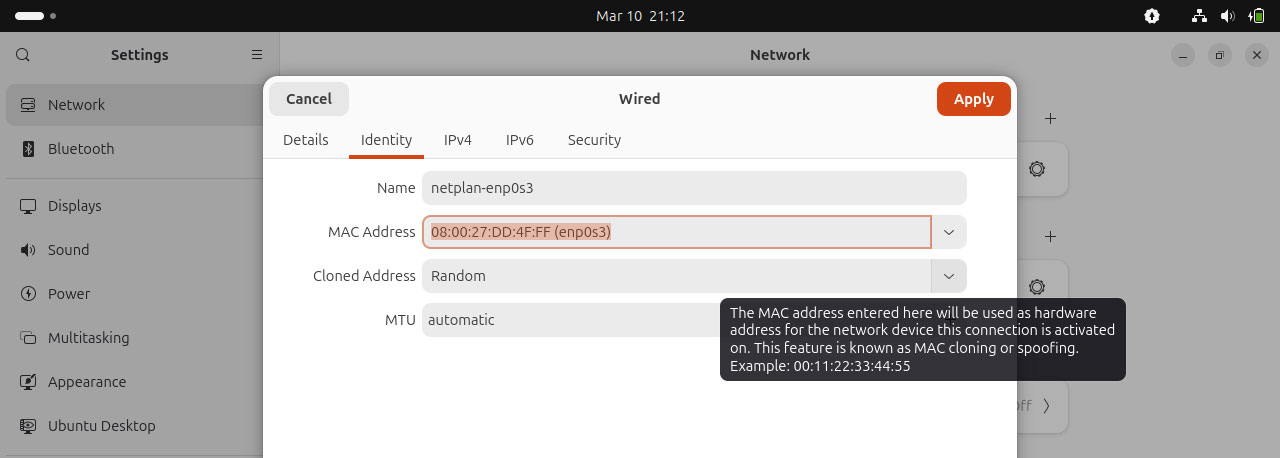
Next, open the Cloned Address dropdown menu and choose Random. Click Apply to save your changes.
Go to the Details tab to see your current MAC address. Disconnect and reconnect to the public hotspot, then return to this tab. You'll see the MAC address has changed.
Step 5. Harden Your Firefox Browser
Firefox has some excellent security features you can use on public Wi-Fi, but they're not all enabled by default.
For example, you can enable Max Protection to ensure the browser always uses DNS over HTTPS. This encrypts DNS requests, making it harder for local network attackers to log the sites you visit.
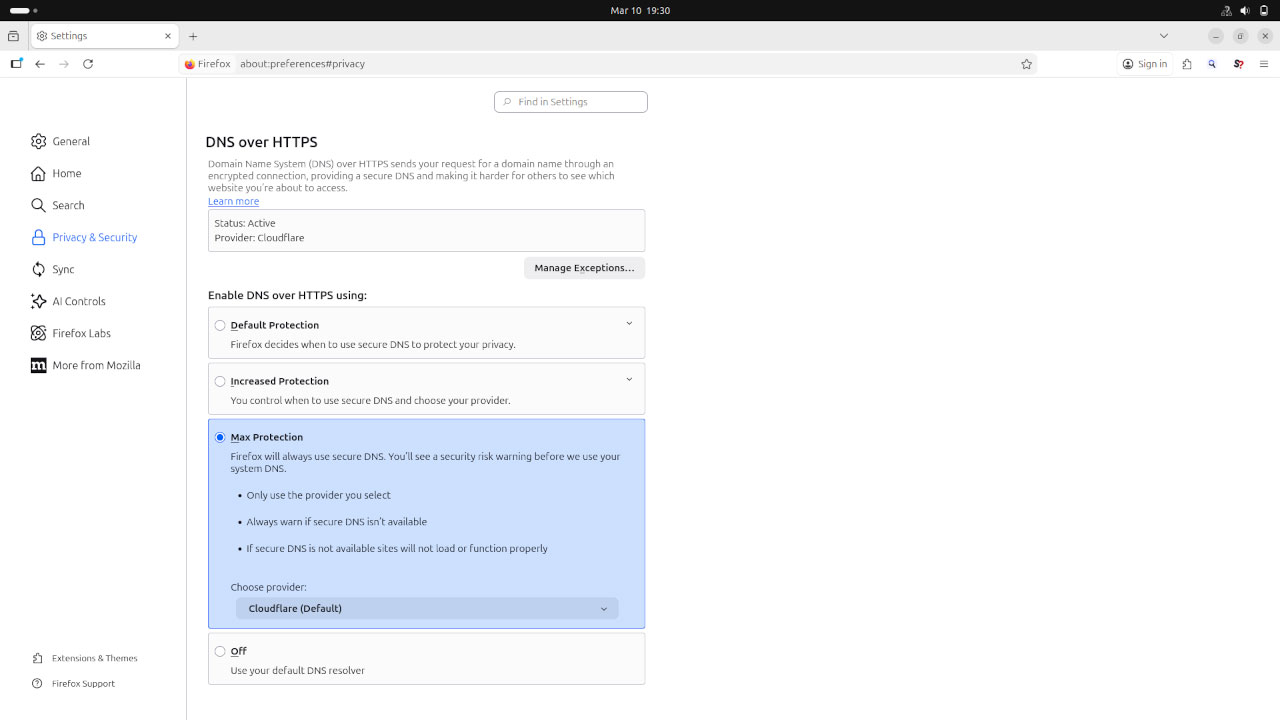
To do this, open Firefox Settings > Privacy & Security. Scroll to the DNS over HTTPS section and select Max Protection.
You should also scroll to the section HTTPS-Only mode and choose Enable HTTPS-Only mode in all windows. This displays a warning when visiting an HTTP site, reducing the risk of transmitting unencrypted data.
Follow our in-depth guide for more steps to harden Firefox on Linux.
Step 6. Maintain Device Security
If someone can physically access your device, your data is no longer secure.
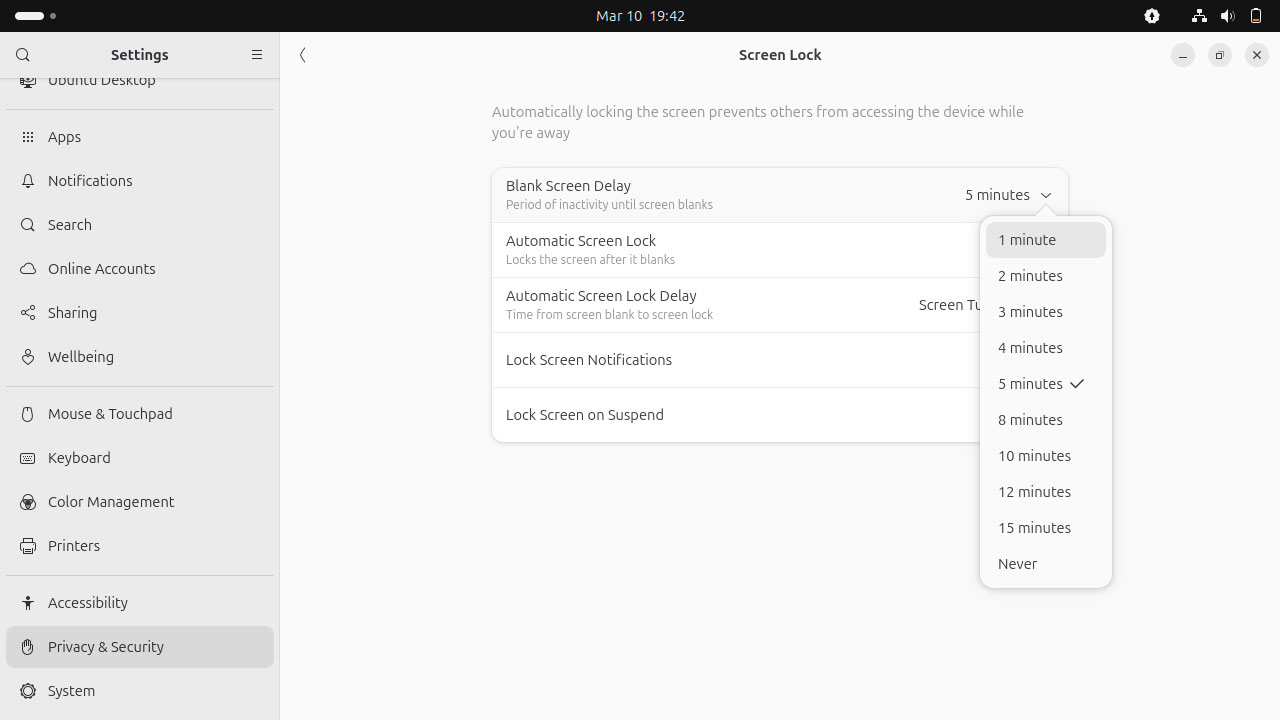
Most Linux distros support locking the screen after a defined period. In Ubuntu, go to Settings > Privacy & Security > Screen Lock to view current settings.
Make sure that Automatic Screen Lock is enabled. From here, you can also change the Blank Screen Delay. In this example, from 5 minutes to 1 minute:
If your Linux distro doesn't support full disk encryption and your laptop is stolen, bad actors can mount your hard disk as an external drive and access your sensitive files.
Most modern Linux distributions offer full disk encryption during setup via LUKS to prevent this. Otherwise, use an open-source utility like VeraCrypt to create a secure, encrypted container for your most private files.
Follow the steps in our guide to secure your files with VeraCrypt to find out more.
Browse Safely on Public Wi-Fi With Linux
While Linux may not include built-in public network profiles like Windows and macOS, you can achieve the same protection by disabling unnecessary services, enabling a firewall, and using a reliable VPN. Add a hardened browser, and your system is far better protected against threats on public Wi-Fi.
Whenever you use your device in public, physical access is just as much a risk as network exposure. Use full-disk encryption or a tool like VeraCrypt to protect sensitive files, and lock your screen whenever the device isn’t in use.