If you’re using a long-term support (LTS) version of Ubuntu like 24.04 Noble Numbat, then all packages in the main and restricted repositories will receive updates for five years from the time of the OS release.
According to Canonical, Ubuntu Pro is a subscription that provides an additional stream of security updates and packages. There are tiered levels of support for desktop, server, and cloud deployments.
The advantages for businesses running Ubuntu are obvious: extended security upgrades can cut costs and help with compliance issues.
Still, even regular desktop users can benefit from an Ubuntu Pro subscription. The free tier currently covers deployment on up to five machines.
Why Upgrade to Ubuntu Pro?
Ubuntu Pro subscriptions are free for personal use, and you can extend long-term support for your OS by an additional five years. With this extended support, you’ll receive security and bug fixes without needing to perform a manual OS upgrade.
Ubuntu Pro also includes several security features to protect your data, such as kernel live patching and security fixes for all packages in the main and universe repositories.
How It Works
Upgrading to Ubuntu Pro is simple. Users just need to sign up via the online portal and select a suitable license.
Canonical then prompts visitors to sign in or register for an Ubuntu One account. Once this is done, the Ubuntu One account page will display subscription details and the relevant security token. You can use this token to register your machine for Ubuntu Pro via the command line.
Step 1. Prepare Your System
Registering for Ubuntu Pro doesn’t require huge system-wide changes. Still, it’s always a good idea to save and close any open programs or files before proceeding. If you haven’t done so recently, run a full system backup using your favorite utility.
Related: Essential Tips for Reliable Linux Backups | June 25, 2024
Canonical’s official documentation also recommends making sure Ubuntu is up to date before upgrading to Pro. The simplest way to do this in Ubuntu 24.04 is via the desktop:
- Click the Workspace switcher at the top left, then enter “update” (no quote marks) in the search box.
- Click the Software Updater icon to launch the utility.
The software updater will now launch and then display any available updates.

Click Install Now and enter your admin password to proceed.
If the system prompts you to reboot to apply updates, click Restart Now.
If you prefer using the command line, just open Terminal and run:
sudo apt update && sudo apt full-upgrade
Hit Y to continue with the Ubuntu Upgrade.
Step 2. Check Your Ubuntu Version
To sign up for Pro, you must be running at least Ubuntu 14.04. If you’re not sure which version of the OS you’re running, click the workspace switcher at the top left of the desktop once again.
Enter and choose About in the search box to view system information, including details of the current version of Ubuntu.
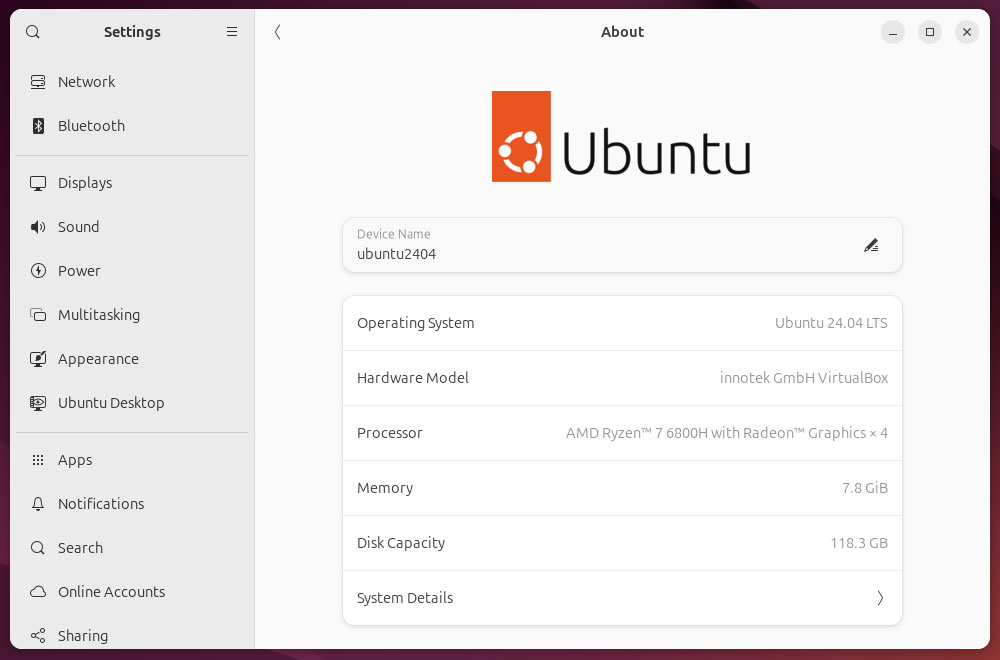
You can also check the current Ubuntu version by opening Terminal and running:
lsb_release -a
If you’re running an older version of Ubuntu, follow the steps in Canonical’s support pages to upgrade your OS before proceeding.
Step 3. Start Your Subscription
Once you’ve confirmed your version of Ubuntu is compatible with Pro, close any open windows and launch your web browser.
Go to Buy Ubuntu Pro to start the subscription process. The Pro portal will ask you to accept or manage tracker cookies before showing the main page.
Once this loads, you’ll be asked, “Who will be using this subscription?” Choose “Myself” to benefit from the free subscription for up to five machines, as outlined above.
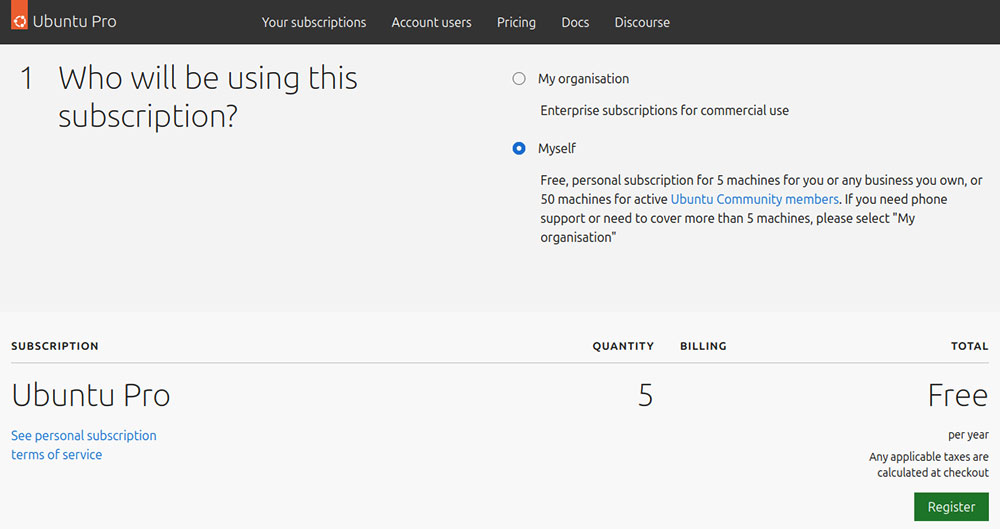
Scroll down and select the Register button at the bottom of the page to continue.
Step 4. Sign In With Ubuntu One
Canonical operates a central login service for all Ubuntu sites named Ubuntu One. To continue, you’ll need to sign in with an Ubuntu One account.
If you aren’t registered, enter your email in the field at the top of the page and choose “I don’t have an Ubuntu One Account.”
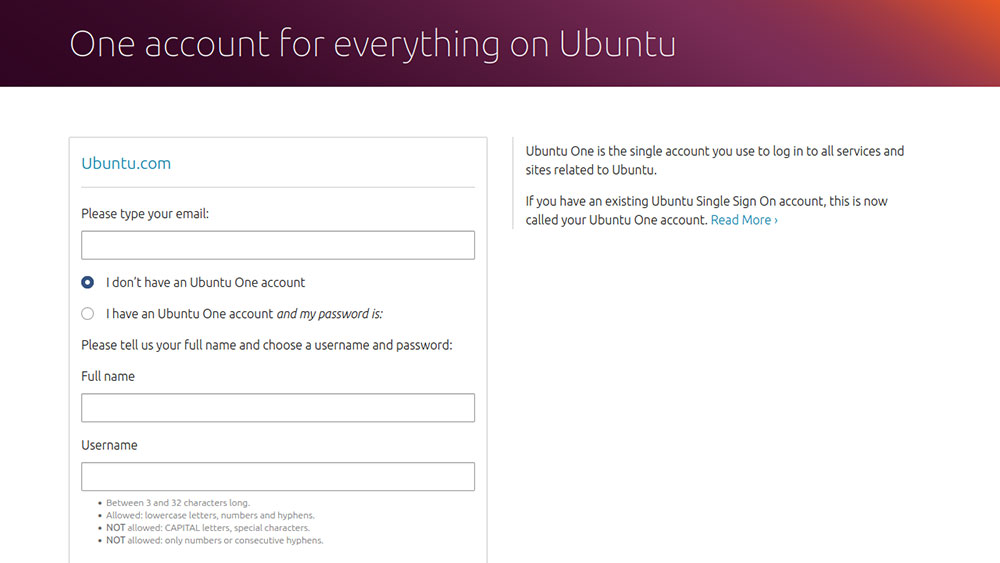
Next, enter your full name and chosen username in the relevant fields. Make sure your username matches formatting requirements: all lowercase, only letters, numbers, and hyphens.
Choose a password and enter it into the box below. Passwords must be between 8 to 512 characters. Finally, check the box at the bottom of the page to agree to Ubuntu One’s policies and click Create Account.
Step 5. Attach Your Machine
Ubuntu One will email you a verification link to confirm your registration. Click this and choose “Yes I’m sure” in the browser window to proceed.
On the new Ubuntu One page, you’ll see a list of the personal information Ubuntu One has requested. Untick or tick these checkboxes as you see fit, then choose “Yes, Log me in.”
You’ll see your subscription details and free personal token on the next page.
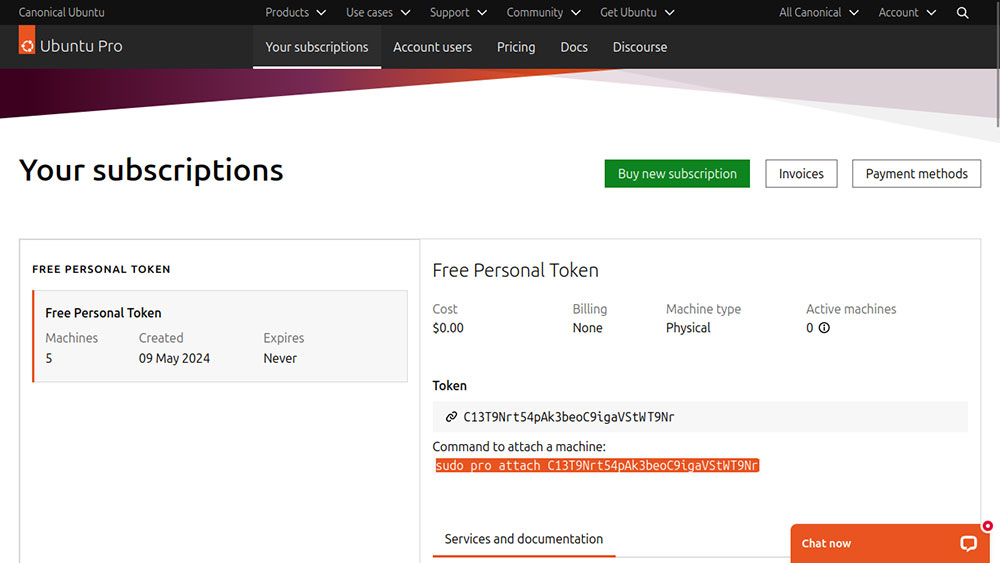
In this section, you’ll also see a command listed under “Command to attach a machine,” e.g.
sudo pro attach C13T9Nrt54pAk3beoC9igaVStWT9Nr
Copy this command, then launch Terminal. Paste the command using Ctrl + Shift + V, then press Enter. Ubuntu will now download the necessary packages and enable Pro services.
Step 6. Confirm Your Upgrade
Once you register your device for Ubuntu Pro, Terminal should list all available and running services.
You can double-check these at any time. Just launch Terminal and run:
pro status ‑‑all
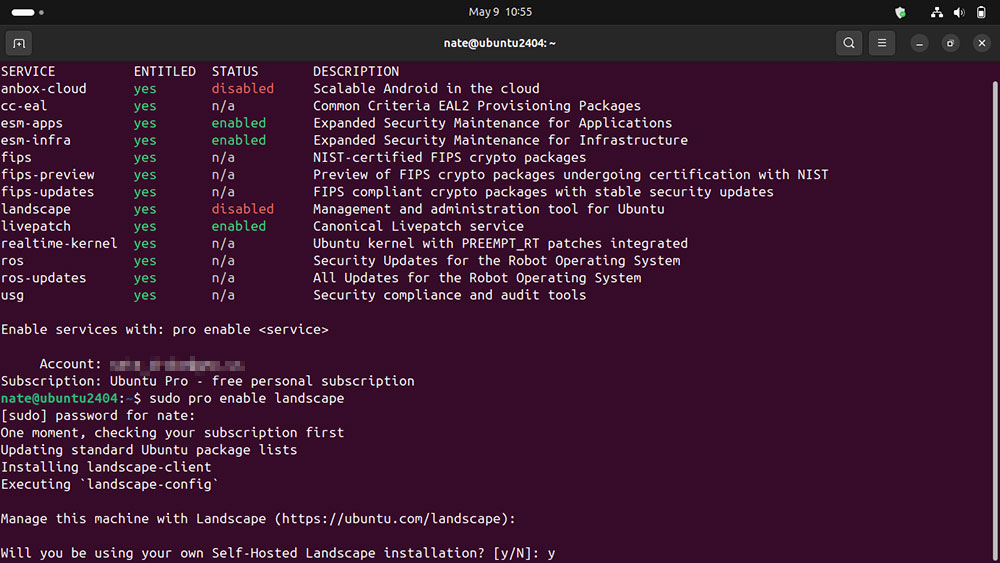
The default settings are suitable for daily use, but if you need to enable a specific service, you can run pro enable [service], e.g.
sudo pro enable landscape
Stay Up to Date
Once you’ve completed the upgrade to Ubuntu Pro, the OS will have access to Ubuntu Pro’s Expanded Security Maintenance repositories each time you run a system update.
To get started using these, fire up Terminal and run:
sudo apt-get update && sudo apt-get upgrade
Now that you’re signed up for Ubuntu Pro, make sure to keep running regular updates to take advantage of new software as soon as it becomes available.
Editor’s Note: The Ubuntu webpage screenshots in this article are credited to Canonical Ltd.


