Canonical released Ubuntu 24.04 “Noble Numbat” on April 25. Noble Numbat marks Ubuntu’s tenth LTS (Long Term Support) release and contains several security and performance improvements.
Ubuntu 23.10 “Mantic Minotaur,” released Oct. 20, 2023, is still receiving security updates through July 2024. Still, there’s no reason you can’t switch to 24.04 today.
In this guide, you’ll learn the steps you need to take to upgrade from Ubuntu 23.10 to Ubuntu 24.04.
Why Upgrade to Ubuntu 24.04 Noble Numbat?
One of the main advantages of switching to Ubuntu 24.04 Noble Numbat is that as an LTS release, users will receive five years of free security maintenance on the main Ubuntu repository.
Users who enroll in Ubuntu Pro, which is free for personal use, benefit from an extra five years of updates for both the main and universe repositories.
Subscribers can also purchase the legacy support add-on for two years of additional support.
If up to 12 years of support isn’t enough, Noble Numbat includes new security features, including user namespace restrictions, binary hardening, and disabling older versions of TLS and AppArmor 4.
Most importantly, all of the Ubuntu 24.04 binary packages have been rebuilt in light of the hidden backdoor in the data compression package xz Utils, discovered in early April.
Read the Noble Numbat release notes to discover all the advantages of upgrading.
How It Works
Although you can technically update to Ubuntu 24.04 Noble Numbat using Terminal (see below), Ubuntu supports easy upgrades to the next version using the integrated Software Updater.
To upgrade, you first need to use the software updater to ensure your installation of Ubuntu 23.10 is up to date. Then, you can rerun the software updater to upgrade to Ubuntu 24.04.
Ubuntu 23.10 will then launch the upgrade process, connecting to the necessary software channels and applicable packages. You’ll also be offered the choice to remove any obsolete packages.
Ubuntu disables third-party repositories and PPAs by default. Once the OS upgrades to version 24.04, you can re-enable these via the command line.
Step 1. Prepare Your System
The upgrade process to Ubuntu 24.04 Noble Numbat is straightforward. However, it’s always a good idea to follow some basic precautions when making significant changes to your OS.
- Save and close any open files and any running programs.
- If you’re using a portable device, make sure it’s plugged into a power source to prevent the battery from draining during the upgrade.
- Make sure to run a full system backup using your favorite utility.
Next, check that your current version of Ubuntu 23.10 is up to date. The simplest way to do this is:
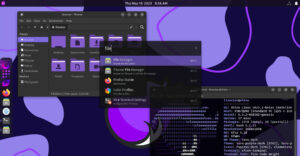
- Click the workspace switcher at the top left, then type “update” in the search box.
- Click the “Software Updater” icon to launch the utility.
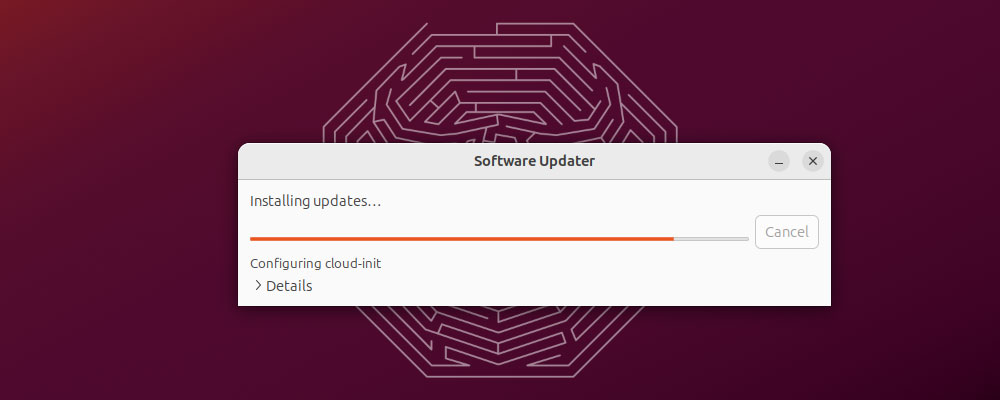
The software updater will now search for and display any available updates. Click “Install Now,” then enter your admin password to download and apply these.
If Ubuntu 23.10 requires you to restart to apply any updates, click “Restart Now.”
You can also use the command line to update Ubuntu 23.10. Open Terminal and run:
sudo apt update && sudo apt full-upgrade
Hit “Y” to update Ubuntu 23.10 to the most recent version.
Step 2. Get Ready To Upgrade
During the update process, the system will likely require you to reboot. If so, log in again to the Ubuntu Desktop.
You can now repeat the steps above to launch the Software Updater via the workspace switcher (top left).
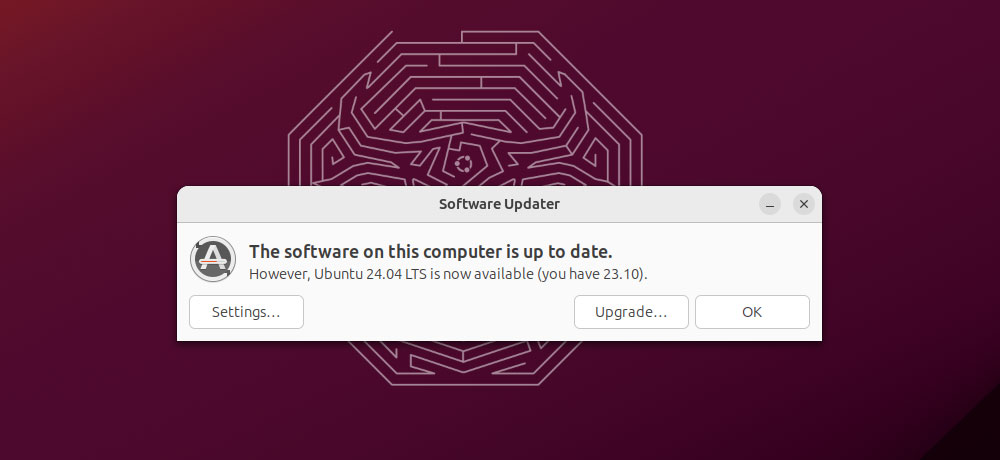
You’ll next see a notification stating that Ubuntu 23.10 is up to date but that a new version (24.04) is available. Select “Upgrade” to continue.
We didn’t see this option during our tests at first, as we were trying to upgrade only a few hours after Ubuntu 24.04 became available. If you have the same issue after launching Software Updater, close the utility, then launch Terminal.
From here, run:
sudo update-manager -c
If you receive a notification stating that no new Ubuntu version has been found, add the ‘-d’ flag to the command:
sudo update-manager -c -d
The upgrade tool should now launch.
Step 3. Start the Upgrade
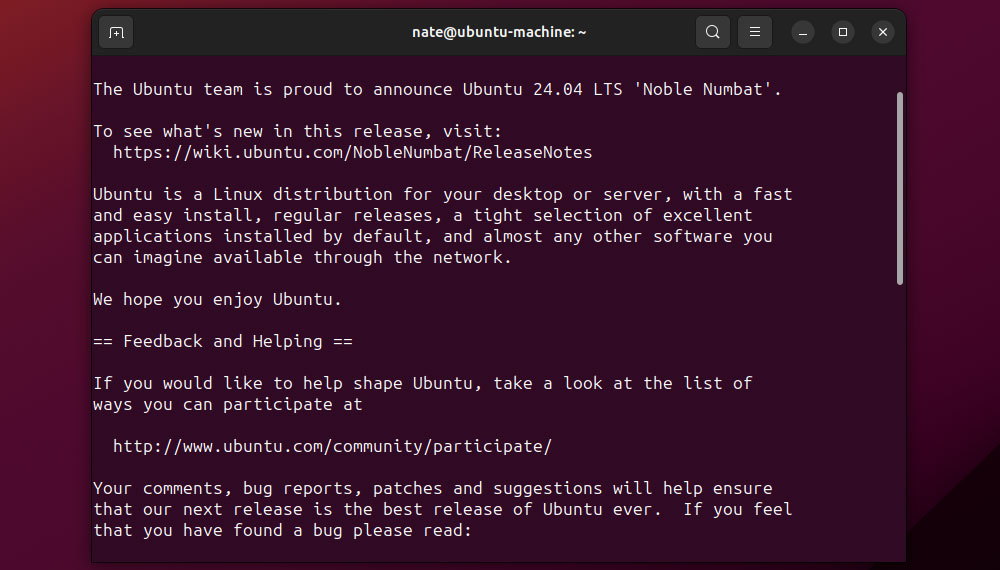
Once the upgrade wizard launches, it will display a brief introduction to Ubuntu 24.04 LTS Noble Numbat and a link to the release notes. Take the time to visit the link and read through these to discover all the latest improvements in Noble Numbat.
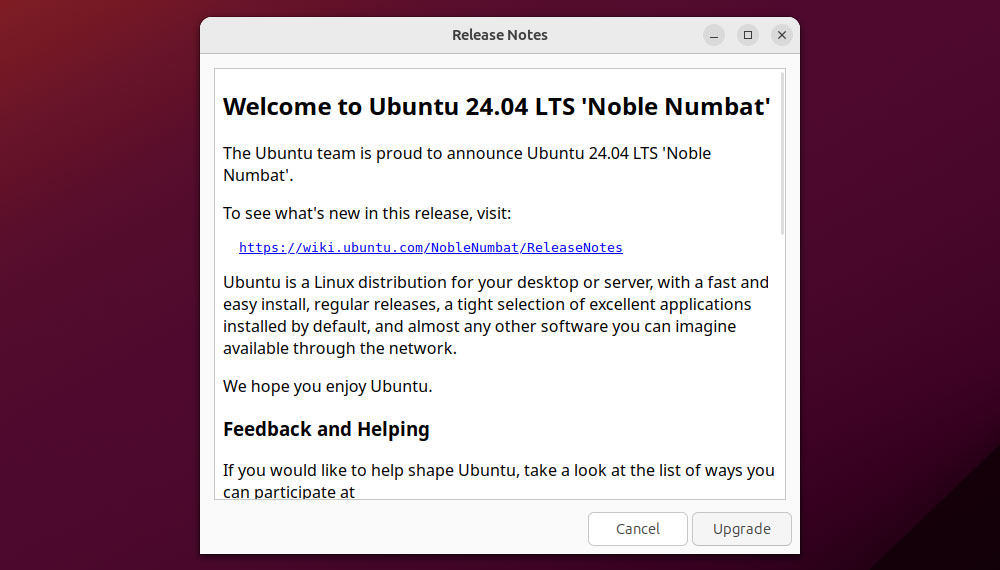
Next, choose “Upgrade” to start downloading the release upgrade tool. Once this is complete, the tool will launch and state it’s “Preparing to Upgrade.” A window will now appear asking, “Do you want to Start the Upgrade?”
Read through the information here, as it lists the number of packages to be installed and the space required. Then click “Start Upgrade” to continue.
Step 4. Install Your Upgrades
The release upgrade tool will begin by setting up new software channels and then start downloading the new packages mentioned in the previous step.
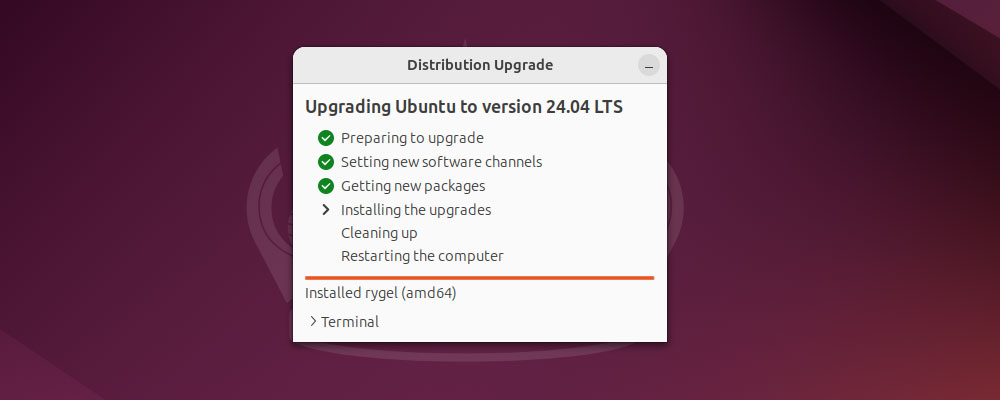
During this process, you may see a prompt regarding “libc6” asking whether Ubuntu should restart services during package upgrades without asking. Click “Next” to confirm.
As the release upgrade tool begins installing the upgrades, you may notice that the system wallpaper will change to the default background for Noble Numbat. At this stage, you can also click “Terminal” to view detailed information on the upgrade process.
Step 5. Cleaning Up
When the release upgrade tool reaches the cleaning-up stage, a window will appear, encouraging you to “Remove obsolete packages.”
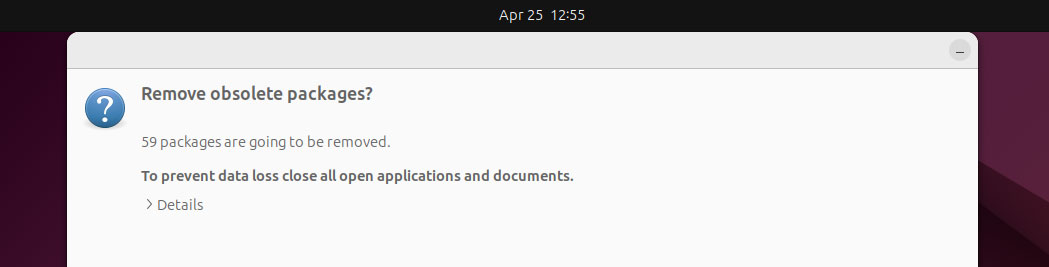
If unsure what to do, select “Details” to view a list of redundant packages. You can choose to “Keep” these, but in the interest of saving space, we recommend you choose “Remove.”
Step 6. Confirm Your Upgrade
Whether or not you choose to remove obsolete packages, Ubuntu will now ask you to restart the OS to complete the upgrade. Select “Restart Now” to continue.
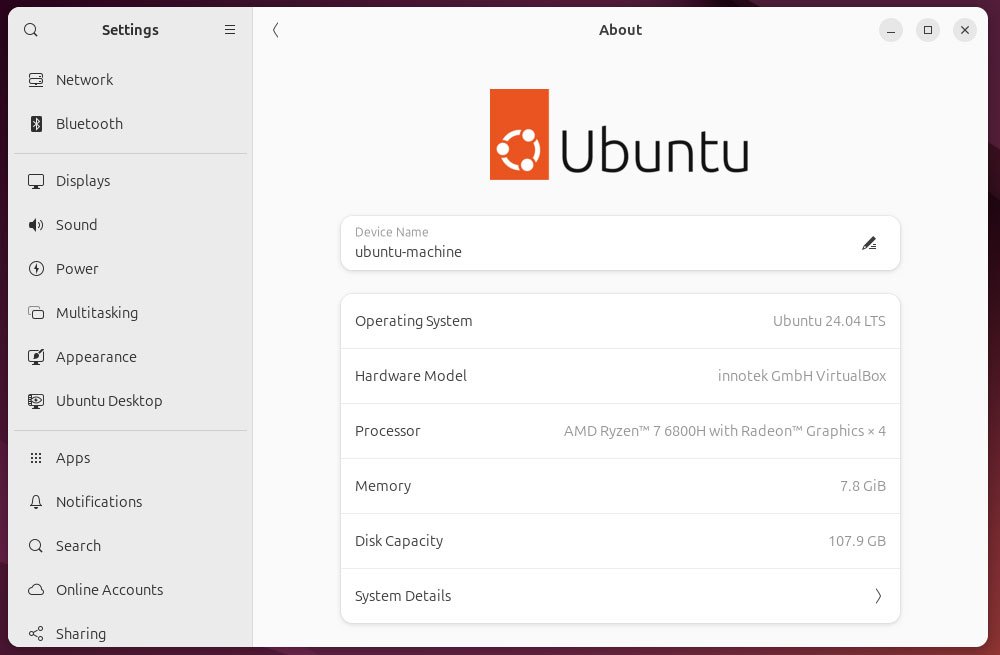
Once logged in to the Ubuntu 24.04 desktop, you can double-check that the upgrade was successful via System Settings. Simply click the workspace switcher at the top left and enter “about” in the search bar.
From here, select “About” in Settings to view your OS version.
You can also check the current version of Ubuntu via the Terminal command:
lsb_release -a
Step 7. Re-enable PPAs and Repos
When Ubuntu is upgraded to a new version, by default, any third-party repositories and PPAs are disabled. Fortunately, these are easy to enable again via Terminal.
Ubuntu 24.04 LTS Noble Numbat has eliminated the traditional /etc/apt/sources.list in favor of /etc/apt/sources.list.d/ubuntu.sources for managing source configuration. This is to keep the OS in line with the new “deb822” format.
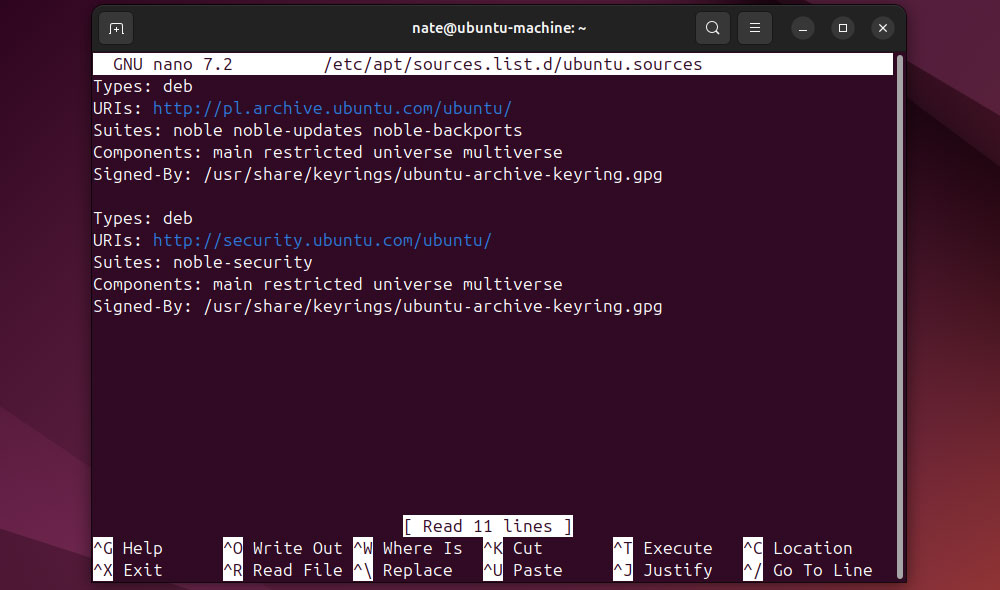
Nevertheless, the basic process for enabling repos/PPAS remains the same:
- Launch Terminal and run:
sudo nano /etc/apt/sources.list.d/ubuntu.sources - If any third-party repos or PPAs you use aren’t enabled, remove the ‘#’ at the start of the relevant line.
- Type Ctrl + X, then Y to exit and save changes.
Stay Up-to-Date
Even after you’ve upgraded to Ubuntu 24.04, you should always check if any further updates have been released. To do this, repeat the instructions in Step 1 to run the Software Updater.
Alternatively, launch Terminal and then run:
sudo apt-get update && sudo apt-get upgrade
Using the Terminal is advantageous in this case, as it will alert you if any of your third-party repositories/PPAs are still disabled.
Upgrade to Ubuntu 24.04 via the Command Line
If you’re an experienced Linux user, you may prefer to upgrade via the command line. This approach has some advantages in that there are no windows and buttons to manage, but first, make sure to go through Step 1 (above) to prepare your system and run a full backup.
Next, open Terminal and run:
sudo do-release-upgrade
This command will specifically check for a new version of Ubuntu and prompt you if you wish to continue the upgrade. Tap ‘y’ to proceed.
When we ran this command in Terminal for this tutorial, we saw a prompt stating that no new release of Ubuntu was available. We were able to fix this by adding the ‘-d’ flag, i.e.
sudo do-release-upgrade -d
We hope you find this step-by-step guide helpful for upgrading from Ubuntu 23.10 to 24.04, allowing your system to benefit from up to 12 years of security updates, performance improvements, and the latest features.
Editor’s Note: The Ubuntu images and screenshots featured in this article are credited to Canonical.